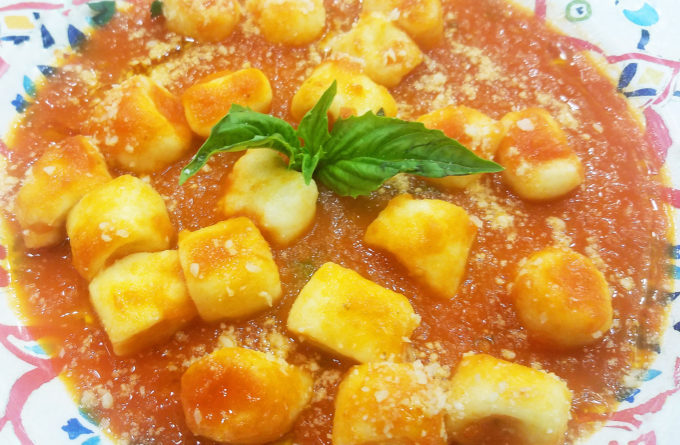
Gnocchi di Ricotta is a nice break from the popular potato gnocchi. The preparation methods are almost identical once you get to the rolling out and cutting phase.
There is just something very special about ricotta gnocchi. People love the light creamy texture that literally melts in your mouth with every bite.
They are a little tricky to make, but I hope with this post you will pick up some nice tips and attempt to make your very own Ricotta Gnocchi and enjoy them with your favorite tomato sauce.
The ricotta cheese and the delicate nature of this gnocchi are the STARS here and are what should shine the brightest in this dish. Therefore, this type of gnocchi is best served with the simplest of tomato sauces. Or simply tossed in melted butter with a nice sprinkling of freshly grated Parmesan cheese.
Excellent ricotta gnocchi making is a true balance act! A balancing act between a semi-sticky workable dough that will obtain a heavenly result versus an over-floured dense dough that will make very unappealing gnocchi, especially for the true gnocchi lovers at heart.
The allure of making this ricotta gnocchi is quite simply the elegant nature of the dish. Hand-formed pillows of ricotta cheese that, when made with accuracy and with care, are absolutely delicious and they will always impress your guests.
The biggest mistake in making gnocchi is the addition of too much flour and not enough egg for binding them. Anyone who has made gnocchi from scratch before knows the balance of perfect gnocchi is not always easy to obtain. If one adds an overabundance of flour in hopes of making them easier to work with and to finish quicker, the gnocchi will be too dense and not even close to the delicate pillow type end result that we are looking for.
If not enough egg is used, the gnocchi will not have the binding power it needs when boiled and they will fall apart in the boiling water. Anyone who has made gnocchi before has had this experience. Many people step back on the amount of egg in the hope of not have to work with an already sticky dough that will become even more sticky from the addition of eggs.
This is the tricky part of ricotta gnocchi making and the balancing act that needs to be mastered so that one can begin to make outstanding gnocchi from scratch.
The bottom line is Practice! Practice makes perfect and that stands true in cooking too. And it especially holds true in the art of making perfect gnocchi from scratch.
In a ricotta gnocchi dough, the dough should remain semi-sticky! Learning to work with it in that way is the trick.
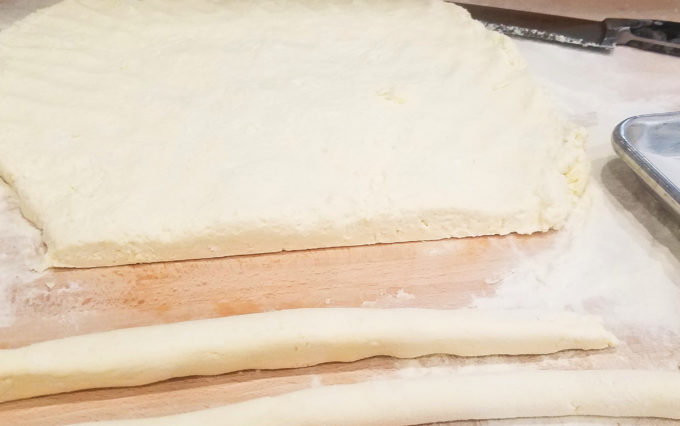
Now, here is the trick! Once the dough is made, use some flour with a small amount of semolina mixed in. Flour your work surface, place the dough on the nicely floured area and pat it out to a uniform rectangle. (This will be explained further below)
Now lightly dust the top of the rectangle with the flour mixture. Do not work the flour into the dough! Just coat the top so it’s no longer sticky to the touch. This will make it very workable without adversely affecting the inside of the dough with excess flour.
If the inside of this dough should still be very sticky and moist. It is perfect! This is what will eventually give the deliciously light, smooth and creamy melted cheese like consistency that we are aiming for.
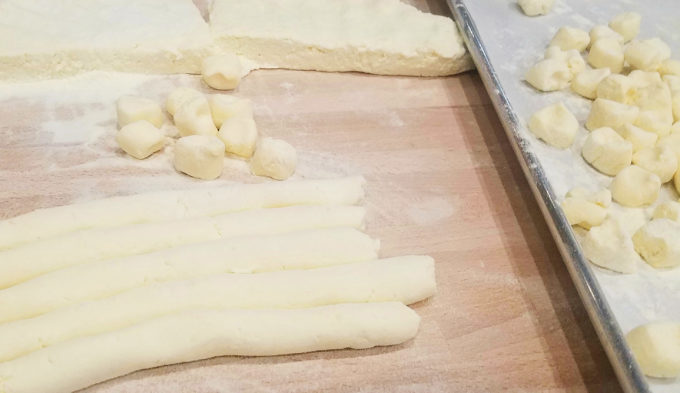
At this point, cut index-finger width strips from the short side of your rectangle and GENTLY roll them with the palm of your hands to form a uniform rope, adding small amounts of the flour mixture to your work surface if the dough begins to stick.
Hint – Remember the more you can work with this gnocchi without the addition of more flour, the lighter and more elegant they will be.
Gnocchi di Ricotta
(8 portions)
Ingredients:
- 1000 g (2.2 lbs) – Ricotta cheese ( drained)
- 750 g (13 oz) – Grana Padano ( finely grated)
- 5 – Eggs
- 350 g (11 oz) – All-Purpose Flour
- salt, white pepper, and nutmeg – To taste.
- Additional flour combined with semolina, for dusting
Procedure:
- Drain the ricotta
- Sift flour
- Add to rest of the ingredients. This can be made in a Kitchen Aid or by hand in a mixing bowl.
Personally I work make this always by hand unless I’m making a very big batch that will be to serve a big group of people. If you use an electric stand mixer be sure to not overwork the dough. Make a soft dough that is semi-sticky. Wrap the dough with plastic wrap and let rest in the fridge for 20-30 min.
Once dough has rested, flour the work area again as mentioned above and form a rectangular shape that is even all around and approximately one index finger high.
Now, proceed with the cutting the strips of dough and rolling out uniform shapes. At this point, the gnocchi may begin to stick to your work surface. Here is where many people go wrong! Do not re-adjust the entire dough by adding more flour. Simply dust the work area with the flour-semolina mixture and gingerly continue to roll out the uniform ropes. The inside on the dough should remain moist and unaffected by the additional flour from the work area.
Once the dough has been rolled out, they can be cut in gnocchi-sized pieces. A good rule of thumb is to cut them as wide as your index finger or as wide as the tines of fork. At this stage, the shaping of the gnocchi is done. I like to move quickly at this point. I use a dimple technique, by lightly pressing each cut piece between my index finger and thumb. This creates a slight dimple on both sides of the gnocchi. Great for holding the sauce it will later be tossed in.
At this point, the cut and shaped gnocchi can be placed on lightly floured trays , covered with plastic wrap and set in the refrigerator until ready to cook. Diffidently leave adequate space between the gnocchi to prevent them from sticking to one another as they get transferred around from the work area to refrigeration and back to work area again.
To cook:
- Bring a pot of water to a boil. Do not salt the water too much; the gnocchi will already be salty from the Parmesan cheese and the salt used while making the dough.
- Once the gnocchi float to the top of your pot of boiling water, scoop out, toss in your favorite sauce and serve.
Tip: These gnocchi will also freeze nicely up to 3 weeks. Once shaped, freeze on the trays. When the gnocchi are frozen, place them in zip-lock bags, label and date them and place back in the freezer to store for another time.


